Henna for Hair 201
{Before you read this post, MAKE SURE you've read the previous post. It's more important than this one. Also note: I'm not a doctor, chemist or color specialist. I learned this info from Google and trial. Your experience will be different from mine.}
I've warned you. I've scared you to death with stories of melting hair and orange roots till Kingdom come and hair-shaming by your stylists. I've completely excused myself from any liability that may result from using henna on your hair.
And yet you're still here... I guess you ain't skeered. I wasn't either. Now then, Allons-Y! Let's get RED.
This is how I do it:
Choose your color:
Three types of plants that permanently dye hair:
- Henna (Lawsonia Inermis): this is the plant to use for red hair results.
- Indigo tinctoria:This is the plant used to bring dark black and blue tones; use this color black on dark brown hair, but blend it with red henna to balance the blues, or your black hairs will turn blue. (unless you WANT blue, of course...)
- Cassia auriculata or obovato: This is NOT red dye. It will color greys to golden blond, and will give shine to every other hair color, and strengthen the hair.
For my auburn hair, I use 1 part indigo to 2 parts henna. This keeps the color auburn, and not orange.
For grey hair that you want to be blonde, use only cassia.

If you are afraid to blend botanicals yourself, or are lazy (efficient) like me, just get Light Mountain products- choose your desired color, and buy the premixed box. Link below.
Mixture and Application:
The coolest and most romantic part about using henna as a hair color is that the set up involves all the things that make you feel cozy inside: Hot tea, coffee, lemons, yogurt, chamomile, cinnamon, apple cider vinegar (ok...maybe not that one as much), music, a cozy spot on the porch swing, and a nice book. These items, plus your bag of REAL ground henna leaf, is all you need to bring your hair to the wonderful world of red. So, to get started, choose your acid for activation:
- Lemon, ACV, Green and Chamomile teas will lend to golden highlights
- Red teas (like TAZO Passion tea, rose hips, hibiscus), cranberry juice, and red wine will add copper tones
- Brown liquids, like coffee and earl grey tea will give brown highlights
- Yogurt or coconut milk will make product texture creamier, for an easier application, and will condition the hair as well
- Cinnamon, nutmeg, and clove will also give rich tones, as well as add a yummy scent to the hair.
You MUST do an allergy test AS WELL AS a strand test if you want to ensure your complete ginger happiness.
Relax- it's easy: first, put a dab of henna mixture on your forearm and wait 4 hours. Rinse and observe any changes or reactions (redness, swelling, itching, burning, etc... ) Then wait 24 hours to make sure no allergies appear.
Next, grab a wad of that hair that's in your hairbrush (make sure it's YOURS.). Massage some of your henna mixture onto the strands, throw it in a ziplock bag, and let it process for several hours. Rinse the finished product, dry it with a hair dryer, and decide if you like the color.
Hold the strands next to your scalp, by your eyes for full effect.
Then hold it by your cheeks. Then gently stroke down your neck with it, while tossing your head back. Now quit it, Kate Moss- what do you think this is? A perfume commercial?
If you're in love with the finished product sample, and your body didn't freak out during the allergy test, read on...
Step 1: Blend henna powder and heated juice, coffee or tea (not boiling, but hot) {if using yogurt or coconut milk, heat up as well- hot, but not boiling; if using lemon juice or apple cider vinegar, just add a couple of splashes of it into hot water}
Add botanicals-cinnamon, clove, or nutmeg now as well, if you want them. I don't do that. I'm too lazy.
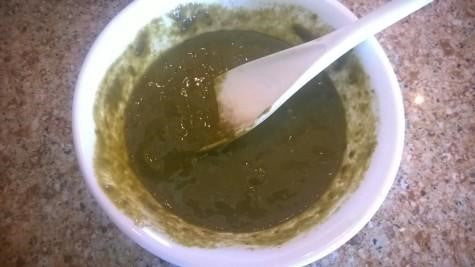
Mixture should look like lumpy yogurt after stirring. No worries- lumps will break down before application.
Step 2: Cover mixture and set aside to activate (it's at this point the acids are weakening the cellulose of the plant and allowing the natural color (lawsone) to be released.
Don't rush it- the longer you let it set (4-12 hours) the more vibrant your color will be.
This is exceptionally important for coloring gray hairs. {I let mine activate for 4-5 hours, and it covers my grays perfectly}
Step 3: After color has activated (released), stir mixture again- lumps will be gone at this point-and begin application. You can see the color release as you stir- the henna blend will be dark greenish brown on the surface, but reddish upon stirring....or maybe it's the opposite...I can't remember...either way, the color traces.
NOTE: If you want to premix your henna for later application, you can freeze your activated product. I do this by pouring the mixture into a pastry bag and tying it closed. When I'm ready to use it, I grab it from the freezer, put the bag into a very hot (NOT boiling) glass of water, and let it warm up. You can snip the end of the pastry bag and apply it directly this way. Don't worry about using the pastry bag tips.
Step 4: Wear a shirt you hate, wrap an old towel around your shoulders, and wear gloves.
Hear me now...WEAR GLOVES. You are not too good for the gloves. Believe me. Anything that henna hangs out on for more than 5 minutes will be red. For days, or for ever, depending on the matter.
Step 5: Rub some balm/ pomade/ointment type product around the hairline to prevent the henna from staining skin. I have the perfect HELP for you.
Step 6: Part hair into very small sections, and work from scalp to ends. Your method is up to you- I apply with a haircolor brush, from forehead, back to neck, and then side to side, but if I have a frozen bag that I premixed, I use the pastry bag, and apply, just like a line of frosting, to the hair line and work it with my fingers down the hair strands.
The most important piece of information here is: Henna will NOT travel; it does not bleed onto other strands like synthetic hair color does. You have to deliberately cover the entire hair strands. Just be thorough, and you'll hit the mark.
Step 7: Wrap hair onto top of head and clip with plastic clip (don't use metal anything with henna- bowls, combs, spoons, foil, etc...could cause a chemical reaction). Cover head with plastic wrap. Then cover that with a fun knit slouchy hat or those hats with ears on top.
Step 8: Find something else to do for the next 4 hours. The longer you leave henna on, the more "lawsone" will find its way into your cuticle. Also, get ready to feel like your head has a clay mask helmet on it...very heavy...unless you've used coconut milk as your acid (in which case will be runny...I don't like it runny)...
Step 9: After processing, Remove hat, plastic wrap, clip, and all of your clothes, and hop in the shower. I want you to understand here that this is about to get messy. But not hair color messy...more like mud-wrestling messy. Just go with it.
Stand facing away from the shower nozzle, eyes pointed to the heavens, and let the warm water flood the earthen shell of your hair, into the spaces between terra firma and silken strand, and down, down, down, back to the foundations of the world. (That was my attempt at making this somewhat burdensome task a bit more inspirational...)
Rinse away. And when you think you're finished, rinse some more.
Step 10: Continue to rinse hair with warm water, WITHOUT shampooing hair. Now listen: you aren't going to use shampoo today. It's too harsh (even the most gentle ones), and could disrupt the dying process. Instead, just keep rinsing until your water runs clear. It takes a little patience-and your hair will feel like straw- it's all totally normal, and will feel amazing after it's completely rinsed and dried.
Step 11: Once water runs clear, add a bit of conditioner, if you want, to the hair. Use a wide-tooth shower comb to distribute the conditioner. After a few moments, rinse some more. Your hair will be clean and clear, but what you won't notice are the teeny-tiny grains of henna (like sand), still dropping from your head. You can actually rinse well enough to remove them all, but if you don't, it's ok, too. You'll just see the grains on your pillow after you sleep.
Step 12: Towel or blow dry hair. Style if ya wanna. And don't think about the fact that you can use shampoo after 24 hours...because, trust me- you'll LOVE the way it looks the next day. (Henna intensifies over a 24-48 hour period.)
P.S...this is your backout point: if you hate your color, you must begin stripping it naturally NOW with alternating applications of mineral oil and clarifying shampoo. Takes several days, but I hear it works.
Your henna hair color will remain vibrant for many months, and will only require root touch-ups as it grows out. (I have to do mine every 3 weeks because I'm almost completely gray.
For touch-ups, follow the same directions, but just apply to new growth.
I reapply henna to my whole head about once a year, to freshen up the color, but it doesn't really need it.
Notes:
- Henna (or in my case, blends of botanicals) allow any natural color variations to be emphasized. Check out my highlights in this pic. It's actually my gray parts- they color lighter than my pigmented hairs:


Finally: Where to get YOUR Henna: There are several reputable online retailers of henna, but I want it to be easy for you, so I'm listing two companies that I purchase from that I trust completely.
- Light Mountain Henna: This brand is found at your natural grocery store or online. I get mine at Sprouts. This brand is great because they've blended for you, in case you want any other tone besides RED. I buy the RED powder and the Dark Brown or chestnut powder, and then mix them- 1/2 dark brown or chestnut to 1/2 red, and activate with hot water and apple cider vinegar.

- Starwest Botanicals: I L.O.V.E. this company. They have superior ingredients, and great service. You can purchase all three botanicals here. The label is tricky, though: "Neutral Henna" is actually Cassia and "Black Henna" is their indigo. Looks like this:

This should be enough info to get ya going.
And with that:
Allons-Y!
Ps...All information provided on this website is for informational purposed only. Neither Keri Lehmann or Savvy Bohème LLC nor any of its entities are responsible for damage incurred by practicing information provided. Reader/ user assumes all risk in application of information, expressed or implied.